
Embroidered Double Christmas Ornament
Description
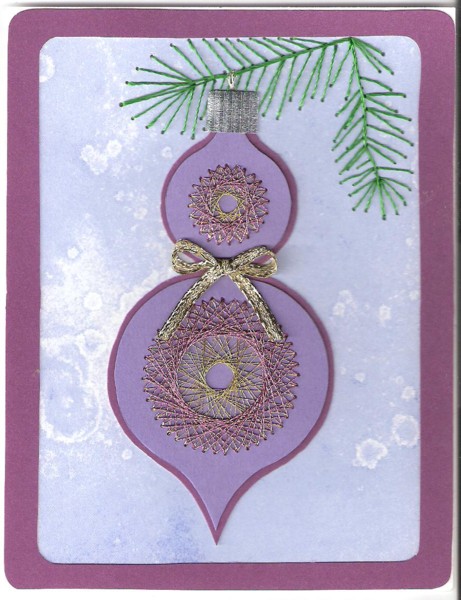
Print the Christmas ornament pattern onto purple cardstock and stitch as follows:
Top Round 1: skip 10 holes
Top Round 2: skip 7 holes
Bottom Round 1: skip 20 holes
Bottom Round 2: skip 15 holes
Cut out the ornament and mount it on dark purple cardstock. Cut around the ornament, leaving a 1/8" border. Add a 1/4" wide piece of silver curling ribbon to the top of the ornament.
Cut the 4 1/4" x 5 1/2" background from blue scrapbook paper and glue it to the card blank. Cut the frame from dark purple scrapbook paper. For best results, stitch the branch before adding the frame (sorry, I stitched the branch free-hand, so I do not have a pattern). Position the ornament as desired and glue it to the front of the card.
Links
Christmas ornaments embroidery pattern
Supplies
- Cellophane tape
- Card blank 4.25" x 5.5"
- Coluzzle nested rectangle template
- Gold embroidery floss (DMC 5282)
- Green embroidery floss (DMC 700)
- Pink metallic embroidery floss
- Dark purple card stock
- Purple card stock
- Blue scrapbook paper
- Gold 1/8" ribbon
- Silver 3/8" curling ribbon